Masterfile Pages List
List view
Quick Links
Quick Links
BSIT 1
BSIT 1
BSIT 2
BSIT 2
BSIT 3
BSIT 3


Bowling
History of Bowling
Bowling is a game in which balls are rolled at an object with the aim of knocking them over or moving them.
- A British anthropologist, Sir Flinders Petrie, discovered in the 1930's a collection of objects in a child's grave in Egypt that appeared to him to be used for a crude form of bowling. If he was correct, then bowling traces its ancestry to 3200 BC.
- Many forms of bowling have been traced back to 3200 B.C. Although a German historian, William Pehle, claims that bowling began in his country about 300 A.D.
- There is also evidence that a form of bowling was popular in England in 1366, when King Edward III allegedly outlawed it to keep his troops focused on archery practice.
- One of the most eccentric games is still found in Edinburgh. The player swings a fingerless ball between his legs and heaves it at the pins. In doing so, he "flops" onto the lane on his stomach. There were and still are many variations of ninepins in Western Europe. Likely related are the Italian bocce, the French petanque and British lawn bowling.
- Undoubtedly, the English, Dutch and German settlers all imported their own variations of bowling to America. The earliest mention of it in serious American literature is by Washington Irving, when Rip Van Winkle awakens to the sound of "crashing ninepins". The first permanent American bowling location probably was for lawn bowling, in New York's Battery area. Now the heart of the financial district, New Yorkers still call the small plot Bowling Green.
- The game had its ups and downs in America. An 1841 Connecticut law made it illegal to maintain "any ninepin lanes", probably because bowling was the object of much gambling. But the problem, of course, also evidenced its popularity. Also, many captains of industry chose to install a lane in their mansions.
- Bowling technology took a big step forward in the early 1900’s
- Balls used to be primarily Lignum Vitae, a very hard wood.
- In 1905, the first rubble ball The Evertrue, was introduced.
- In 1914, the Brunswick corporation successfully promoted the Mineralite ball, touting it as a “Mysterious Rubber Compound”
- The game soon became organized with agreed upon standards and was growing in popularity.
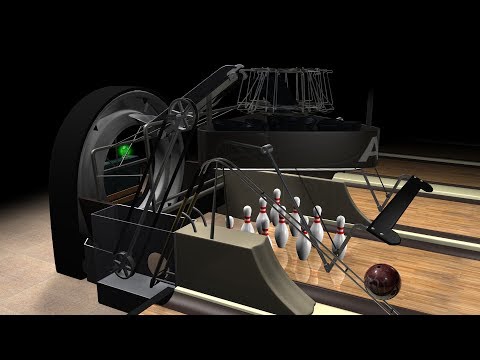
- One great technological breakthrough that changed the game was the invention of the automatic pinsetter by Gottfried Schmidt. The patent to this was later purchased by AMF Corp. who went on to become a leader in the bowling industry.
Terminologies
- Average
Your average is the sum of all your games divided by the number of games played. You can use your average as a way of recording your improvement - set a goal of raising your average game, say 10 pins a season, until you reach the level of par bowlers.
- Bag
After getting a 'turkey', most people start referring to the string of strikes as if they are collecting them in a bag, e.g. four-bagger, five-bagger etc.
- Brooklyn strike
This refers to shots that "crosses over" the 1-3 pocket for right-handers and 1-2 for left-handers and produces a strike. It originated in New York where people would "cross over" to Brooklyn from Manhattan. A side term "Jersey side" references left-handers and refers to people crossing over from Manhattan to New Jersey.
- Clean Sheet
If you make all your spares in the game it is called a clean sheet. Making your spares is the simplest way to raise your average on the way to becoming a scratch/par bowler.
- Dutch 200
Dutch 200 refers to a game in which strikes and spares are alternated (spare-strike-spare strike etc) for the entire game, which results in a score of 200 exactly. The term is believed to be a take-off of "Dutch treat" or going "Dutch" where two people share the cost of a date.
- Foul
The foul line is drawn across the lane to separate the approach from the start of the lane. Putting your foot over the foul-line means you don't get the score for that delivery: on the first delivery you must re-rack the pins. It is marked on the scoresheet with an "F".
- Frame
There are ten frames in one game. You have two chances to knock down the ten pins in each frame. The tenth frame rewards you with a final bonus ball if you convert your spare (or make two strikes). You can thus throw nine strikes in the first nine frames and, if you get another two in the tenth, the bonus ball means the most strikes you can have in one game is twelve. This is called a perfect game.
- Open Frame
If you fail to make your spare, i.e. knock all pins down in two shots, it is called an open frame.
- Perfect game
Every bowlers ambition, is to some day, achieve a perfect game. By scoring strikes in every frame, the maximum attainable score is 300. Even professional bowlers, who play in championships worldwide, have only a few perfect games in their career.
- Series
Adding up the scores from all the games you have played will give you the total series. Most leagues will play three-game series. It is common to use the series as a measure of success. Big tournaments will play many more games and, instead of recording total pinfall, bowlers compare their positions by talking of how many pins over/under par they are, with par usually being 200 (e.g. +20, -10, just like in golf).
- Sleeper
If you leave a spare where one pin is standing directly behind another, the rearmost pin is called the "sleeper". In some circumstances this is also called a bicycle, double wood, oneinthedark or tandem.
- Spare
If you leave one or more pins standing after your first delivery, you get a second chance to knock all the pins down, this is your "spare" shot. If you knock all remaining pins down on the second shot you have made your spare. A spare is marked on the scoresheet with a "/". The scoring system rewards you by adding in the pins from the next ball into the current frame. See also split.
- Split
This is a spare left when two or more pins remain standing, but with a gap between them. Spares are naturally a little harder to make (since you need to put the ball between two pins, or slide one pin over into another) and bowlers don't like to leave a split. It is common to draw a circle round the pin-count on the score sheet to indicate that it was a split.
- Strike
When the bowler knocks down all ten pins with the first delivery of the ball it is called a strike. Your score goes up by ten, but like a spare, you get a bonus - your next two deliveries are added to the score. Stringing strikes together will raise your score dramatically (See turkey). A strike is marked on the scoresheet with an "X".
- Turkey
A turkey is bowling lingo for three strikes in a row. Probably, the most famous score for amateur and professional bowlers alike. This is partly due to the fact it has an unusual name, and partly because even a beginner can get one. The term dates back to before the turn of the 20th century. In those years, scoring was much more difficult and to get three strikes in a row was quite an achievement. During Thanksgiving or Christmas week, the proprietor would present a live turkey to the first person on each team who scored three consecutive strikes. The term has carried over ever since.
- Washout
A special kind of split is the washout, where the headpin remains standing as the ball hooks by it.
- Wicked frame
When bowlers bowl a "strike" on their first frame
Facilities and Equipments
FACILITIES
Lane Length
The overall length of a regulation lane is 62 feet 10 3/16ths inches measuring from the foul line to the pit. It must be 60 feet from the foul line to the center of the No. 1 pin spot with a tolerance of 1/2 inch permitted. It must be 2 feet 10 3/16ths inches from the center of the No. 1 pin spot to the pit.
Lane Width
The lane shall be between 41 and 42 inches in width. The lane plus the gutters shall not be less than 60 inches nor more than 60 1/4 inches wide.
Lane Surface
The surface must be free of all continuous grooves. A maximum 40/1000th inch will be permitted in levelness and depth depression.
Lane Approach
Extending back from and exclusive of the foul line there shall be a clear level approach of not less than 15 feet in length. A tolerance of 1/4 inch is permitted on depth depression of grooves.
The Pin Deck
The tail plank must be a Maximum of 2 inches in width and the back line of pins are 3 inches further on. Each pin is 12 inches from its neighbor in any direction (as measured from the center of each pin) so the pins are in an equilateral triangle with the head pin 34 and 3/16ths inches from the tail board.
Equipments
Bowling Pins
- Pin Composition:Pins are shaped from Maple wood, which is then coated with a 3/32-inch-thick layer of plastic.
- Pin Weight:The pins weigh between 3 lb 6 oz and 3 lb 10 oz.
- Pin Positions:The diagram below indicates the pin numbering system that is commonly used.
Bowling Ball Weight, Size, Markings & Holes
- The surface of the ball must be free of all depressions or grooves of specific pattern, except for holes or indentations used for gripping the ball, identification letters and numbers, and incidental chipping or marring caused by wear.
- The diameter of the ball must be constant.
- The circumference of a ball shall not be more than 27.002 inches nor less than 26.704 inches, nor shall it weigh more than 16 lbs (there is no minimum weight).
Here is a list of the common ball weights.
6 lb = 2.72 kg7 lb = 3.18 kg8 lb = 3.63 kg9 lb = 4.08 kg10 lb = 4.54 kg12 lb = 5.44 kg14 lb = 6.35 kg16 lb = 7.26 kg
Other Requirements
- Movable devices are not permitted in a ball except that a device for changing the finger span or size of the finger and thumb holes may be inserted provided it is locked into position during delivery and cannot be removed from the ball without being destroyed.
- The introduction of metal or any other substance no comparable to the original material used in the manufacture of the ball is prohibited.
- Plugs may be inserted for the purpose of re-drilling; ball. Designs may be embedded in a ball as guides or for observation or identification purposes provided the designs are flush with the outer surface of the ball.
- There shall be no interior voids and the plugs or designs must be of similar material to although not exactly the same as the original material out of which the ball was made; and shall otherwise comply with all bowling ball specifications.
- No foreign material may be placed on the outer surface of the ball.
- The surface hardness of a bowling ball shall not be less than 72 Durometer 'D'.
Skills and Techniques
Spinner
- This technique refers to the way of delivering a shot with the intention that no more than a minor part of the ball touches contacts the lane. This technique promotes less friction between the ball and the lane, not considering the "oiling pattern" of that lane. As a result the ball glides practically in a straight line down the lane.
- Experts contend, however, that this kind of shot is not very successful in that it does not attempt to take full advantage of the dragging the power of the bowler.
Stroker
- With this kind of technique, the bowler relies more on precision than strength. This technique is characterized by employing the "by the book" style of playing that entails the proper execution of even movements, keeping square shoulders to the target all the way through the release of the ball, and maintaining an on-time move at the "foul line.“
- This is the "classic" technique of most bowlers because it employs smooth and controlled movements and lessens the possibility of injuries.
Cranker
- This is the kind of technique that is being employed by a bowler who relies more on his strength to deliver a good shot rather than accuracy. It is like 'hitting hard' when a bowler uses this technique.
- The skill involves more adrenaline that constitutes the bowler's drive to win.
- Usually, crankers use "late timing", they do not slide, attempt to get to the "foul line" earlier than the ball, and they bend their elbows to keep their hands at the back and beneath the ball.
4 basic bowling techniques - Timing, Release, Rotation and Finish.
Timing
- is key if you are aiming to hit a 200+ bowling average.
- When your timing is off even by a little the whole swing is thrown off.
- Timing leads directly to releasing the ball to get the perfect shot.
Release
- For the utmost control and precision, your ball should be released when your arm is at the bottom part of the swing.
Rotation
- The rotation of your ball comes into play at the precise time that the ball is released.
- Rotate your fingers a little just as you release the ball.
- This should produce a hook shot as the ball crashes into the pins.
Finish
- When you finish, your arm should be pointing up, as this is good form.
- Mainly if you finish in this form you will have a powerful swing and your revolutions will be high.
Here are the 10 basic steps for a perfect release:
- Pick up your ball.
- Get your mind ready to bowl.
- Get your body ready to bowl.
- Eye your targets.
- Push out the ball.
- Let the ball swing back naturally.
- Let the ball swing forward and take your step toward the target.
- Throw the ball onto the lane.
- Release the ball.
- Evaluate your bowling performance.

Swimming
Introduction
The fact that the Filipino people whose country is composed of more than 7,000 islands and who trace their ancestry to seafarers, are expected to be skill full in aquatic activities because of the country’s archipelagic nature. People travel from one island to another for trade, business pleasure and work, endangering their lives on crowded and unsafe ships. Most of them are not trained on what to do in times of emergency. Half of the year, the country experiences heavy rainfall and typhoons causing floods in many areas. Lives lost because most of the people do not possess aquatic safety and survival skills.
Students exposure to swimming skills is very limited because outdoor recreation programs like camping, boating and hiking are seldom provide for in physical education classes, hence students do not have the opportunity to test themselves on how to cope with the eventualities of life after they have finished schooling ( Nillos, 2004).
Objectives
- Define swimming and related terms.
- Identifying the important dates in the history of swimming.
- Identifying and discuss the use of each swimming equipment and facilities.
- Give opinions on the importance of knowledge on how to swim the front crawl.
- Enumerate the do’s and don’ts in swimming.
- Perform the necessary skills in learning front crawl confidences and precision.
- Observe and follow all the rules and regulations in swimming and in saving lives.
Origin of Swimming
The word swimming is derived from the old English term “swimmin”, which means the act of propelling oneself through the water by means of the arms and the legs. Swimming as practiced by man probably dates back to the prehistoric times. Literature and sculpture prior to the Middle Ages furnished many indications that swimming was common among various people through the ancient world. Ancient has belief, dated around 880 B.C., showing soldiers propelling themselves through the water by an over arm stroke that resembles the modern front crawl stroke.
It was also believed that prehistoric people learned to swim by watching the actions of the animals in the water and logged cut tress floating then imitating those motions. Hence, indicates that swimming was acknowledge at the time. Competitions took place in Japan in 36 B.C., and that country was the first to take to the sport in a major way with an imperial edict by the Emperor Go-Yozei decreeing its introduction in schools.
The plagues that swept in Europe during the Middle Ages discourage recreational swimming. It was generally believed that outdoor bathing was contributing faster in spreading the diseases. By the 19th Century that belief had been dispelled and in the late 19th century amateur swimming clubs began conducting swimming competitions as a competitive sport.
In 1837, England introduced swimming as a competitive sport. The English was the first people of modern times to complete swimming as a sport rather using it primarily as a skill of survival. Early English swimmers used breaststroke and the modern sidestroke. By 1845 North America Indians traveled to England to swim competitively. The Indians swimmers used an overhand stroke or similar to a windmill action that form a crawl stroke. The English swimmers were shock when the Indians won the most of the contest because their stroke was faster than the English stroke.
In 1869, formal rules for swimming meets were first established by England’s Amateur Swimming Association. By 1878 the first world swimming record was recognized. It was set by E.T. Jones, who swam 100 yards in 68 and a half seconds. In late 1800s J. Arthur Trugen an English swimming instructor introduced a double overhand stroke using the scissor kick, it was known as “Trudgen Crawl”. This stroke has recently restored to competitive swimming and some modern distance swimmer have set new records using it . American J.H. Derbyshire using the trudgen crawl, swan 100 yards in 60 seconds for the world record.
In 1878, Frederick Cavill, an English man and his family immigrate to Australia. They observed the swimming style of the local native’s kicking action, combined with double overhand stroke as resulted in an exceptional speed. This stroke is known as “Australian Crawl”. In the 1900s, Cavill’s family helped spread the Australian Crawl to England and United States. Eventually the Australian Crawl evolved into the American Crawl and into the Freestyle swimming techniques used today.
Values / Importance of Swimming
- – Doctors agree that swimming is the best exercise for the lungs, muscles and bones.
- – You will not only be able to save your own life but also the life of other people in case of an emergency.
- – Swimming is a worthwhile activity that one can engage in during leisure hours.
- – When one is endowed with the ability in swimming. He/she might be able to engage in any simple activity leading to competition in swimming.
- – Swimming can be a factor in good peer relationship. It offers many opportunities for social interactions with other people.
Physiological Value
Safety Value
Recreational Value
Competitive Value
Social Value
PHYSICAL LAWS APPLIED TO BODY MOVEMENTS IN THE WATER
Effective instructors of swimming and related aquatic skills must have an understanding of the human body, the physical laws or mechanical principles that affects motion, and the forces that produce or retard motion of the human body through the water. Understanding the effects of physical laws on the performance of swimming strokes and other aquatics skills enables instructors to gain insight into the cause of ineffective movements. This understanding also enables them to provide instructional techniques that contribute to effective performances by their students.
With few expectations, humans must inhale and hold their breath in order to float in the water. The majority of people are able to float and most of them float motionless with the body at an angle to the surface (diagonal position) or in a near vertical position. That people are able to float is explained by Archimedes’ principle- a body is buoved by a force equal to the weight of the water that the body displaces. The body will sink if the weight of the immersed body is greater than the weight of the displaced water. Conversely , the body will float if the weight of the immersed body is less than the weight of the displaced water. The amount of buoyancy of an individual is governed by the amount of air that is inhaled and held by the composition of the body.
BODY COMPOSITION
The differences in the buoyancy of individuals will vary considerably depending on the relationship between the amount of heavier bone and muscle tissue and the amount of lighter adipose (fatty) tissue. Adipose tissue has a specific gravity of less than 1.0 which is the specific gravity of water. Anything having a specific gravity less tan 1.0will float in the surface. Bone and muscle tissue have a specific gravity greater than 1.0 and will tend to sink. Individuals , usually men, who are heavily muscled, who have heavier bone structure, or who have little body fat, have a larger proportion of lean body mass and a smaller percentage of adipose tissue and will have more difficulty floating. Most women have a greater percentage of adipose tissue relative to lean body mass than men are likely to float more easily.
An easy test called the “jellyfish float” can be used to determine the degree of buoyancy of a swimmer. While in chest-deep water, the swimmer submerges to the neck, takes a deep breath of air, bends forward from the waist, places the head in the water, and bends the knees enough to get the feet off the bottom. The person holds the breath and relaxes as much as possible. If the person sinks, the swimmer’s weight is greater than the buoyant force of water. If a portion of the head or the back remains above the surface, the person can learn to float in the back with the face out of the water.
` Individuals with marginal buoyancy will have to use explosive while floating on their backs to keep their faces from submerging while getting an exchange of air. Explosive breathing means a rapid exhalation followed immediately by a rapid inhalation.
Little can be done to affect the weight of the individual. However, by inhaling more deeply, the area of the chest is expanded to a greater degree, which increases its volume without any significant change in weight. The results is that segment of the body is spread over large surface area of the water, resulting in less weight per square inch and thus increase in buoyancy.
The slight difference in the specific gravity of fresh water and salt water affect one’s buoyancy in the water. Since salt water is slightly more dense than fresh water, it can support more weight. An individual who floats in fresh water will float slightly higher in salt water or will tend to float in a more horizontal.
CENTER OF GRAVITY AND CENTER OF BOUYANCY
The position in which a swimmer floats is determined not only by the overall composition of the body but also by the relative positions of the center of gravity and the center of buoyancy within each individual while trying to float. On land or in the air, the person turns or rotates around a point at the center of weight called the center of gravity. In the water, however, the person rotates around a point in the chest region called the center of buoyancy.
The center of gravity of a person lying horizontally on the surface of the water with the arms at the sides of the body is at the center of all weight and is located somewhere in the pelvis. Since the body segments are of different weights, the distance of each segment from the center of gravity of the body plays a role in determining the exact location of the gravity.
When a person is lying horizontally in the surface, gravity tends to act on each body segment individually to pull it down. The buoyant f0orce of the water will support each segment horizontally if the specific gravity of each part is less than 1.0 some body segments maybe more buoyant than others. An arm float, but a leg, with a heavier bone structure , might not.
The primary upward (buoyant) force of the water is directed through a point in the chest area called the center of buoyancy of the body. The air in the lungs makes the chest area, with its light bone structure and very light muscle structure, the most buoyant part of the body. Consequently , the chest tends to float at a surface.
A motionless float occurs only when the center of buoyancy is aligned directly over the center of gravity. With persons of average build, these two centers are aligned in a somewhat parallel position to the surface of the water when the person attempts to float in the horizontal position on the back with the arms extended along the sides of the body.
In this position in the water, the average person has more body weight located in the hips and the legs than in the head and the shoulders. The force of the gravity pulls the hips (center of weight) and the legs downward. The buoyant force of the water acts as if it were pushing upward on the chest area (center of buoyancy). These opposing forces cause the body to act like a teeter-totter. The body starts to rotate forward as the hips and the legs move downward. When the center of gravity in the pelvis has rotated to a point directly below the center of buoyancy in the chest, the person float motionless. However, as the legs sink during forward rotation of the body, their downward momentum increases. This increased velocity of the legs, plus their weight, may cause the body to submerge, since the force of buoyancy is insufficient to overcome the force of gravity and the downward movements of the legs.
This tendency for the legs to pull the whole body under the water means that beginners should not be taught the back float from horizontal position but from a vertical position where the feet will tend to rise to the person’s normal floating position. The learner should be in the water of the shoulder depth. When the head is laid back so that the back arches gently and the arms are extended outward from the shoulders, the water will begin to support the body. Without any push-off, the feet will rise to the normal floating position for that person. Through practice the swimmer will learn which of the three positions is the normal one for him or her-horizontal, diagonal, or vertical.
Swimmers who float motionless in the vertical or diagonal position can learn to float in a more horizontal position by changing the positions of their arms and legs. These swimmers may want to learn to alter their normal floating position in order to demonstrate the back float in more than one position ore merely to increase their overall aquatics abilities.
LAW OF INERTIA
The law of inertia states that a body remains at rest or in uniform motion unless acted upon by some external force. External forces that offer resistance and impede forward momentum cannot always be eliminated but they can and should be minimized for most effective stroking. These resistance forces are classified as frontal.
The implications of the law of inertia are clear in swimming. There is always a trade-off involved between the duration of rest in the glide potion of a stroke and the amount of propulsive effort necessary to overcome the body slowing down because of the resistance forces of water. If speed is the main concern, as in competitive swimming or approach stroking for a rescue, the glide portion is shortened to maintain a constant speed. If swimming for relaxation or distance is involved, then the glide portion can be lengthened to provide a longer rest period. However, the glide portion should not be held until forward momentum ceases, since extra effort is required to re-establish forward motion. This situation is comparable to pushing a car by hand. Once the car starts moving it takes less effort to keep it moving than the initial effort it takes to start the action.
LAW OF ACCELERATION
The law of acceleration states that the velocity of a body is proportional to the force applied and occurs in the direction in which that force acts. Simply stated, the harder the swimmer presses backward against the water, the faster the swimmer will move forward. An increase in the velocity of the swimmer in the desired direction is also dependent upon the swimmer maintaining a good position and smooth, well- coordinated, and efficient movements of the arms and the legs.
LEVERAGE
In stroking, the entire arm and the hand act as a third-class lever. Force is applied between the fulcrum (shoulder joint) and the resistance of water to the surface of the arms and the hand. The law of levers states that the product of the force times the length of the force arm is equal to the product of resistance times the length of the resistance arm.
The force is the muscle force applied; the force arm is the distance from the shoulder joint to the point where he force is applied (about 2 inches from the shoulder joint where the muscles involved are inserted). Resistance is mostly water resistance; the resistant arm is the distance from the hand back to the fulcum.
Flexing the elbows as the arm moves through the water shortens the resistance arm, with the result that the same propulsive effort can be affected with only about half the force applied compared to when the arm is straight.
RELAXATION AND BREATHING
In addition to physical laws that govern body movements in the water, two other factors-relaxation and breathing-also affect swimming performance.
RELAXATION
Swimmers attempting to propel themselves are never completely relaxed. The aim of skilled swimmers is to relax those muscles that are not contributing to a desired movement. Activating muscles that need not to used during a stroke can actually inhibit the desired movement as well as hasten fatigue. The actions and movements of beginners in the water are usually awkward, tense and tiring , since they use many more muscle groups than necessary.
BREATHING
The importance of proper breath control while swimming cannot be overemphasized. Persons who do not get a regular, sufficient supply of oxygen will soon tire. Rhythmic for facedown strokes can be learned and perfected when practiced constantly.
In all strokes, inhalation and exhalation must be done in a manner that will result in minimum interference with stroking rhythm and that will minimize any change in correct body position.
Proper breathing techniques are also important for health reasons, especially for strokes in the facedown position. Water that enters the sinus cavities or the inner ear canals through the nasal passages can lead to infection. While exhaling under water, some air should be exhaled through the nose, at a pressure equal to or greater than the pressure of the water inward, in order to prevent water from entering nasal passages.
In the strokes where the face is carried beneath the surface, the interval when air is inhaled is short; therefore, air must be inhaled quickly through the mouth. The exhalation begins through the mouth and the nose as soon as the face re-enters the water, and continues, slowly and steadily, until the next inhalation is ready to be taken, it should be expelled quickly as the mouth is clearing the water.
Some highly skilled swimmers who posses good breath control do not exhale until just before they take another breath, at which time they expel the air rapidly through both the nose and the mouth. This is referred to as explosive breathing and prolongs the period of greater buoyancy, since more air is retained in the lungs for a longer period of time. However , this style of breathing is not introduced in Red Cross courses, as previously described, is very important in developing smooth, efficient and well-coordinated swimming strokes.
ADAPTING TO BODY CHARACTERISTICS
No two swimmers will perform the same swimming strokes in an identical manner, yet both swimmers may perform the same stroke with equal efficiency. Differences in body characteristics, such as buoyancy, flexibility and the range of movements in the body joints, length of the arms and legs, size of the hands and the feet, and the speed of the movement of the arms and the legs, affect the ability of individuals to perform swimming strokes. It is vital, therefore, for the instructor and the student to understand that a proper pattern of movement for each stroke must be adapted to the swimmer. Use of the laws and principles will lead to smooth, relaxed, effective for almost every swimmer.
RULES FOR SAFETY SWIMMING
- Learn to swim well enough to survive in an emergency.
- Never swim alone and swim only with a buddy who has the ability to help when necessary;
- Swim only in supervised areas.
- Follow the rules set up where you are swimming.
- Learn the simple and safe reaching rescues.
- Know how to administer artificial respiration.
- Know your limitations and do not overestimate your ability.
- Stay out of the water when overtired.
- Dive only into known waters of sufficient depth.
- Always swim a safe distance away from diving boards and platforms.
- Call for help ONLY when you really need it.
- Remember that a non-swimmer should never attempt a swimming rescue.
PROCEDURE IN USING THE SWIMMING POOL
- Secure clearance from your teacher in using the pool.
- Do you warm-up exercises and stretching exercises.
- Secure your belongings in your lockers.
- Take your shower and do bring along your towel.
- Enjoy your swimming activities with your PE teacher concerned.
- After the swimming class, take a shower the second time around.
EQUIPMENT FOR WATER FUN AND SAFETY SWIMMING
- Mask – designed to cover the eyes and nose. Normally used for skin and SCUBA diving. Increased underwater visibility and allows the swimmer to drive deeper than with goggles.
- Goggles – designed to keep the water out of the eyes. Creates an air space in front of the eye in which increases visibility underwater. May decrease apprehension of facial submersion. Give the swimmer better awareness of the body position in the water. Dangerous if used in depths more than 3-4 feet and when diving from a height such as the springboard.
- Earplugs – used to reduce the chance of ear infection. Dangerous if used in depths than 6-8 feet underwater .
- Nose plugs – used to keep the water out of the nose. Approximately used for more advanced skills such as synchronized swimming skills, where the time because the swimmer does not have to exhale to keep the water out of the nose during inverted skills.
- Kickboard – designed to float and used primarily for practicing the kicking skills. Can be held in many different positions.
- Pull buoy – designed to be worn between the legs ( somewhere between the knees and crotch) to isolate the arms for stroke drills.
- Life Jacket – a Personal Flotation Device (PFD) designed to be worn by the user. Will keep the swimmer on the surface of the water. Should fit snugly. Life jackets are the safest choice for non-swimmers who wish to venture into deep water.
- Fins – designed to increased propulsive effect of the kick. May be used by weak swimmers to experience better body positions or swimming faster. Can be used as equalizer in a game or activity situation. Can be used for fitness swimming to improve kick strength and endurance and to improve ankle flexibility.
- Safety Line – designed to divide shallow water ( 5 feet or less) from deep water. Should be standard at all tools with deep water.
- Rescue Equipment - standard most pools and includes aluminum reaching pole.
- Ring Buoy – a life preserver in a form of a ring.
- Weighted Objects – designed to go to the bottom. Most often used for object recovery. Examples are: rubberized rings and rubberized bricks.
TERMS IN SWIMMING
- Aquatics – pertaining to water or sports performed in the water.
- Buoyancy – the upward force of the water in a submersed object.
- Breath Control – involves the ability to hold breath as well as exchange air through the mouth and nose in a rhythmic manner.
- Float – to be suspended in the water or staying on surface of the water without support: types of Floats:
- Tuck Float – to float with your hips and knees flexed, with your hands holding the shins, head in the water and your rounded back bobbing above the surface.
- Prone or Stomach Float – to float face down with arms and legs extended on both sides.
- Supine or Back Float – to float face up with arms and legs extended.
- Gutter – the edge of the pool at water level. Water from the surface splashed over the gutter and is drained away. This helps keep the water surface clean and less agitated.
- Swimming – is the physical adjustment of your body to the environment of water with the use of the arms and legs. (Nillos, 1983).
FRONT CRAWL STROKE (FREESTYLE)
The crawl stroke is the fastest and one of the most efficient of all swimming strokes. The ability to perform an effective, smooth crawl stroke is a mark of a skilled swimmer. This stroke employs the flutter kick, which is a misnomer, since the legs do not actually flutter up and down. The need to develop a perfect six-beat crawl is no longer given the emphasis it received for many years. The use of two or four beat kicks and two or four-beat kicks have proved to be very effective in modern day competitive swimming.
BODY POSITION
The swimmer is in prone position, nearly horizontal to surface of the water. The body is straight and the hips and the legs are maintained in a position just below the surface at all times. The head is aligned with the body, with the waterline approximately at the hairline, but this position will vary somewhat with individual differences in swimmers. The body and the head will roll from side to allow for maximum Propelling efficiency of the arms and for effective inhalation and also to permit free and easy recovery of the arms because of reduced frontal resistance.
LEG ACTION
The leg action is commonly called the flutter kick, which is an alternating up and down movements of the legs. The kick originates from the hips with resultant undulating actions of the lower legs, the ankles, and the feet. The length of the legs and the degree of flexibility in the hips, the knees and the ankles can affect the range of motion of the legs and the effectiveness of the kick. In the kicking action, a relaxed ankle and foot will produce a toeing-in effect naturally. Over – kicking will simply lead to fatigue and will retard overall stroke effectiveness.
BREATHING
The swimmer’s head remains in line with the spine through the stroke. Inhalation through the mouth occurs when the arm on the breathing side is one-half to three-quarters of the way through its backward pressing action. In order for the mouth to
Properly clear the water for inhalation, the head must rotate independently with the shoulders.
During inhalation, the cheek opposite the breathing side is nearly flat to the water. With the head properly positioned, and depending on the swimmer’s speed, inhalation can actually take place with the mouth just below surface level, in a trough of air that is created by the flow of water about the head. As the arm at the breathing side begins to lift from the water, the head rotates facedown position and exhalation begins as the mouth is in the water. Exhalation is through the mouth and the nose and is smooth and continuous until the next inhalation is taken. An inhalation and an exhalation occur during every stroke.
Most good swimmers learn to breath well to one side of the body. It is desirable to learn alternate side for breathing for convenience, added safety to develop a balanced stroke and to permit the competitive swimmer to more readily observe other contestants during a freestyle race.
ARM ACTION AND COORDINATION
The hand enters the water almost directly forward to its shoulder, finger tips first, thumb side of the hand rotated downward slightly, with the elbow bent and higher than the hand. The opposite arm is about halfway through its pressing action, with a definite Bend in the elbow and with the hand under the midline of the body. This arm accelerates to the completion pressing action from this position.
The entry slides forward and downward to the catch position. When this position is reached, the arm is fully extended, the opposite arm has almost completed its backward pressing action, and the inhalation is almost completed.
From the catch position, the forward arm and hand start to pull backward toward the long axis center of the body. The elbow is kept higher than the hand and lower than the shoulder during propulsive movements. The opposite arm begins to recover when the forward arm starts to pull.
When the lower arm and the hand are pressed back to a point just below and in front of the shoulder, the elbow achieves maximum bend. The palm is kept positioned so as to keep maximum pressure against the water during its entire backward push. The opposite arm is about halfway through its recovery. The forearm and wrist are relaxed and the elbow is higher than the hand, with the hand slightly outside the elbow and near the water.
The lower arm begins to accelerate its pressing action backward toward the feet as the opposite arm completes its recovery. As the hand enters the water, the head and the body start their rolling actions unto the side of the entry arm. Except for the inhalation, the arm actions as described above are then performed on the opposite side of the body.
BowlingHistory of BowlingTerminologiesEquipmentsSkills and TechniquesSwimmingIntroductionObjectivesOrigin of SwimmingValues / Importance of SwimmingPHYSICAL LAWS APPLIED TO BODY MOVEMENTS IN THE WATERBODY COMPOSITIONCENTER OF GRAVITY AND CENTER OF BOUYANCYLAW OF INERTIALAW OF ACCELERATIONLEVERAGERELAXATION AND BREATHINGRELAXATIONBREATHING
 Made with Bullet